Monthly Archives: November 2014

Repetition, and It Feels So Good

Repetition, and It Feels So Good

Sorry, my head is stuck in the 1970s. Hope you’ll forgive me!

Today’s card is all about repetition. If three giraffes are good, how about a card full of butterflies?

butterfly repetition card before || noexcusescrapbooking.com

Super simple, and soft and pretty, don’t you think? Do you think it’s missing something? Maybe a little dimension, a little pizzazz? Me too.

How about another butterfly, stamped on vellum, with a tiny bit of stickles thrown in?

butterfly repetition card after || noexcusescrapbooking.com

Does that jazz it up enough for you? I think I like it.

butterfly repetition card detail || noexcusescrapbooking.com

Yep. That makes me happy.

Don’t forget to sign up for my email list if you’d like to get a card in the mail from me. The sign up is at the top right side of the page.

supplies used: (affiliate links)

Three Giraffes 4 You

Three Giraffes 4 You

Let’s continue with the simple trend today, shall we?

When you have a smaller image, there are a number of things you can do with it, when making it your focal point. You can mat it to help it stand out. You can go super minimal, and just stamp it on a plain white background, using color to make it really shine. Or you can stamp it multiple times.

3 giraffes wild 4 U || noexcusescrapbooking.com

I’m not sure why I stamped this three times, and then used a ‘4’ on the sentiment, but it made sense when I was putting it together.

The sentiment is a combination of teeny tiny letter stamps and a small ‘4’ from a Basic Grey alpha set, on an arrow shaped journaling sticker. Remember to look at your supplies as parts and basic shapes, not just the whole pieces they are originally designed as.

If you’d like me to send you a card, make sure you’re on my email list! (Sign up is at the top right.)

Supplies used (affiliate links)

copic sketch markers

Pretty Little Butterflies

Pretty Little Butterflies

There are some stamps that you can reuse over and over again. This is one of my favorite, never out of style stamps.

butterfly card || noexcusescrapbooking.com

The cool thing about old favorites, is that there are lots of new ways to use them, but going back to tried and true techniques never fails. This butterfly was stamped with memento ink, and then filled in with the lightest copic marker colors I own. A few pieces of paper from a couple old 6×6 paper pads, a little distressing of the edges, and the card was done.

This is one of those cards that you can turn into an assembly line product. Stamp a whole bunch of butterflies, color them in while you’re waiting at a doctor’s office, or in front of the TV, distress your edges or not, and then assemble. When making a lot of cards, whether for Christmas or any other big event, keep your card simple. Just because you can make wildly artistic cards, doesn’t mean the recipients won’t appreciate a more streamlined yet still beautiful card.

There’s one little detail you may not be able to see. The red background isn’t plain, it has small butterflies stamped with versamark all around the outside edge. It added jut the right finishing touch for the card.

Don’t forget to sign up for my mailing list (above right) if you want to get a card from me. I’d love to send you a card!

copic sketch markers

Everything But the Kitchen Sink

Everything But the Kitchen Sink

Today’s card feels like I threw everything but the kitchen sink into it. We’ve got alcohol inks, punches, dimensional glue and pop up windows here. It could be a grand mess of a card, but I think it works.

Let’s start with the outside.

spaceship card || noexcusescrapbooking.com

Here, a spaceship is stamped and colored and fussy cut, and mounted on pop dots over the background. The background was created by pouncing alcohol inks in stream slate and pearl on glossy coated cardstock. I used a metallic ink to stamp some stars on the background, and also added a few tiny punched stars in a gold foil tissue paper. I really like how it came out personally.

The interior features another of those stamped transparencies I showed you earlier this week.

spaceship interior || noexcusescrapbooking.com


And a pop up window! How’s that for fancy? đŸ˜‰

I used my Creative Memories oval cutter to trim the transparency to an oval that fit within the window. The card parts were part of a set I got years ago, and they’ve been gathering dust for ages.

Putting this together made me realize I’d rather design my own window card than use a prepared set, so I’ve got a set of ten cards left that I can give away. If you’d like them for yourself, leave a comment below, and I’ll pick someone to send them to.

As a reminder, I am sending out these cards to those of you on my mailing list who send me your addresses. First step to getting one of these cards? Sign up above for my mailing list!

I love giving the post office work.

Supplies used: (affiliate links)

copic sketch markers
adirondack alcohol inks
marvy re-inkers

Working with a Sketch

Working with a Sketch

Let’s start with something a bit different today. Let’s look at one of my favorite parts of digital scrapbooking– page templates.

A digi template is a pre-designed digital page, where all you need to do is add papers and photos to finish your page. Most of the time, when I’m doing a digi page, I use a template. I just love how easy it is!

My friend Jen of Jen Wright Designs creates digi templates and other digi products. She shares new templates on a weekly basis. Her current template can be found here: Jen Wright Designs. This week, we thought we’d show you how to use a digi template as an inspiration point for a more traditional paper page.

jen wright designs sketch

As you can see, Jen’s template is nice and straightforward, with lots of strong structure. It’s very easy to use as a sketch for a paper page.

I started out by looking for pictures that I could either trim or print smaller to use as supporting photographs.These were already printed at a smaller size, and the orientation of the larger picture fit with the orientation of the sketch.

rock hound || noexcusescrapbooking.com

The first paper I chose was the circled star card from a Project Life set. The other papers were scavenged from my scrap bin, using the colors of the photos and the PL card as an inspiration point. I didn’t have enough ‘O’s for my title, so I cut out one of the rocks to use an additional O. After I had finished my journaling, it still looked like it needed some kind of embellishment. First glance around my desk led me to a small bottle of plastic pebbles, which fit perfectly with my theme. Many glue dots later, the page was done.

As you can see, I kept pretty close to the template. I merged the top left two spaces together, used rectangular rather than square photos on the bottom left, and rounded my corners. It’s not exactly like the template, but it is pretty close.

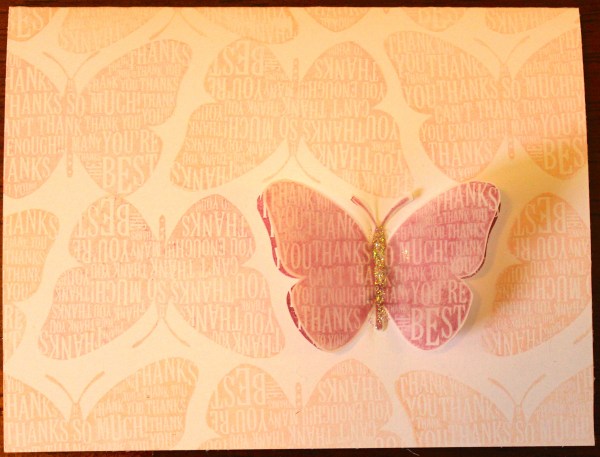
Since it IS card month here, let’s adapt this to a card too!

happy hour card || jen wright designs template || noexcusescrapbooking.com

I think I am on an orange and blue-green kick this week.

As you can see, this stays very true to the structure of the original template, just leaving off one of the smaller spaces on each row to fit on the smaller area of a card.

The stamps were all colored with markers, for a quick and easy card.

Do you like this template? You can see more digi templates over at Jen’s website. Pick one out and turn it into a page or card! You can do it! It’s fun!

Don’t forget, if you want a card from me, sign up for my email list up top! I’d love to send you a card!

Supplies used: (affiliate links)