Category Archives: how to scrapbook

Gathering Materials: Week in the Life Project

Gathering Materials: Week in the Life Project

I’ve got a video for you showing everything I pulled together to use for our Week in the Life project.

How are you doing with your project? Have you gathered together some photos and memorabilia?

I’ve got lots more of this process to show you. More will be coming soon!

Organizing a Story

Organizing a Story

Well, last week was a wash. The story I thought I would be telling? No where in sight. But I did capture a week in our life, and that’s still precious, even if it’s not the story I thought I would be telling.

IMG_5146

Looking back through the week’s photos, I have not a single picture of us eating dinner together, even though we did. I didn’t take any pictures of my feet up on a foot rest while letting myself recover from straining my back and hip. Or of the book I read, or the planning I tried to do to keep myself productive. No pictures of the kids breaking open the piñata, or attacking big blocks of ice with hammers! (Now that could have ended poorly.) In short, there are lots of pictures I missed. But that doesn’t mean I can’t include those stories in my album.

The first thing I will be doing to start telling this story, is gathering all the photos I took. That includes phone photos and computer photos. (Take a picture of yourself while playing on your computer if you can. You’ll be amused at the faces you make!)

Once I have everything together, I will start deciding which photos I should print small, which should be 4×6, and which should be 6×8. As I gather photos, I’ll also make notes about any additional stories I want to tell that I may have missed writing down during the week. I’ll also pull together memorabilia and facebook and twitter updates to add to the story.

That’s what I’ll be working on today and tomorrow. If you want some suggestions on how to choose which photos to print, check out this post. Feel free to pop any questions for me into the comments   below.

Once I’ve got everything ready to go, I’ll show you how to put it together. This is going to be fun!

Quick Monday Note: Getting Started Documenting

Quick Monday Note: Getting Started Documenting

A quick note to show you how I am using the printables I gave you last week.

I printed out a copy of each of the journaling card prompts and two sets of the stop, drop, and write list.

IMG_4972

I’ve got a copy of the list on my refrigerator, and started the stop, drop, and write exercise as soon as I got going this morning. I’ve also got a sheet for keeping tally marks of how many sodas we drink, and loads of dishes and laundry we do as well. I find it to be useful to keep track of just how much routine stuff I do.

IMG_4969 IMG_4970 IMG_4971

I’ll use the prompt cards as my family does something interesting. I think I may use the “She did what?” card right now, and document this morning’s fiasco. You’ll have to wait to see what I write till next week. 😀

Have you started documenting your week? You will love being able to look back at this later!

Week in the Life: What to Document

Week in the Life: What to Document

When many people think of documenting a week of their life, they immediately put up road blocks. “My life’s not interesting,” “I don’t do anything,” “I’m boring,” are all phrases I’ve heard people say when approaching the idea of documenting daily life.

First of all, none of those statements are true. You don’t really think your life is boring, do you? Aren’t you utterly absorbed in what you do every day? That’s not boring, that’s routine. While you may think your routine is boring, it really isn’t, especially when you realize that it changes over time. By documenting it now, you are making yourself your very own time capsule, that you can dig up at any time.

Second of all, stop putting yourself down. When you are saying your life isn’t worth documenting, you are devaluing yourself. You are worth knowing. Your life is worth sharing. Please take the time to do a project like this. You’ll be surprised at how much you do, and when you look back, you’ll be surprised at how much you’ve forgotten.

One of the realities of life is that horrible experiences are so much easier to remember. The good days, the routine days, those are easily forgotten. If you document your daily life, you’ll be able to hold on to the wonderful bits that make life so worthwhile just a little longer.

The other big road block people create when they think of this project is to say that they can’t take that many photos, or record everything they do. True, this may be harder than usual, but it is easier than you think.

First, try to keep a camera handy regularly. Use the camera in your phone if you don’t have your actual camera in hand. Put your camera next to the bed, so it’s the first thing you see in the morning, and you’ll remember to use it right as you start your day. Try to enlist your family to help. I’ll be trying to talk my husband and kids into taking pictures while they are at work and school, but they may not play along. If you run out of ideas of things to take pictures of, I’ve got a list you can print out with lots of ideas for you.

Microsoft Word - Photos to take.docx

Downloadable Photos to Take Printable

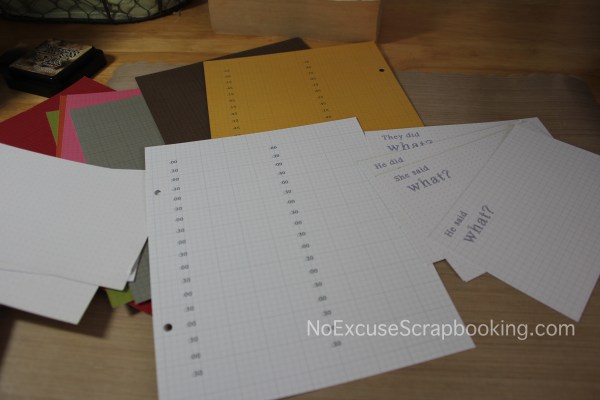
Second, keep a few little notebooks handy so you can record random thoughts during the day, and the things the people around you say. The photo print out will also work as story prompts, and I’ve got two printables with some tried and true journaling techniques for you as well.

First up: download stop drop and write. This is a couple sheets formatted to be printed on a Simple Stories journaling insert. Set a timer to go off at half hour intervals throughout the day, and write down what you are doing or thinking, or what is going on around you. Keep it short and sweet. Twitter, not Michener. Next, I have some he said, she said prompts you can print right on your 4×6 journaling cards. These are intended to be used when someone says or does something that you find very memorable.

Remember, this is a project you CAN do, and you will treasure it when it’s done. Next week, I’ll be sharing up some of the pictures and stories I capture, and the following week, I’ll work on assembling the album with you. This is a fun and extremely do-able project. Are you going to join me?

Letting Your Organization Evolve

Letting Your Organization Evolve

To continue our conversation regarding organization, it’s always good to occasionally reevaluate what parts of your system are working, and what aren’t. Let me show you what I mean, with the small changes I’ve made in the past half year.

Once again, let’s start off with the view from the doorway. Did you notice that the sewing machine and cricut are now on the far table? I found as I settled in and used my space that I was using the table by the door as my main work space most of the time. It only made sense to switch the rarely used tools with my most commonly used ones.IMG_4898

IMG_4900I’ve added a vision board and an inspiration board on either side of my computer desk. They are both works in progress, but they help keep me motivated, and give me a place to put things I don’t want to forget, or things I find fascinating.

Next, you can see a close up of the corner with the sewing machine and cricut, as well as some commonly used items. My most recent papers and embellishments and a bin with most of my alpha horde keeps them handy, and easy to access. Beside them are two project bins (one has my week in the life supplies that I’ll show you next week) and another work in progress is in the bag on top. The location for the project bins and works in progress is new. We’ll see how that fits in with my current systems.IMG_4905
My stamping station has stayed basically the same. I just dragged the binder with old unmounted stamps out of the closet, and added the art prints and paper sorter on the wall above it. There’s another project in it that I need help from the family in order to finish, some organizational stuff, and my zentangle supplies. (I just started playing with zentangle. It’s been fun so far!)IMG_4906
My son’s desk area has expanded. He’s got some storage items he’s barely started using, and cork board to hang his latest creations on. My button and flower supply is there as well. He likes using them as much as I do, so he doesn’t mind sharing his space with me.IMG_4907
Finally we’re back around the room to my current workspace. My current project is on the table, along with a bin for journaling cards and most used pens, and my newest experiment, a bin for my scraps. I have a TON of scraps, and I want to use them, so I’m going to work on using this scrap bin as a first place to look for paper, and hopefully using some up, so I can pull more out of my file cabinet. My trimmers and other most commonly used tools are still within arm’s reach, on the cart where the cricut used to live.IMG_4908

When you reevaluate your organization, you don’t have to tear everything apart. Make little changes as you go. See what works, and what doesn’t. That’s what I do, and it makes being organized so much easier.

Do you have any organizational challenges? Feel free to share them. I’d be glad to brainstorm ideas with you!